
Concrete pouring is a critical step in ensuring the durability and longevity of any project, be it a residential patio, driveway, or a commercial foundation.
As an experienced contractor specialising in both residential and commercial concrete work in Geelong, I understand the importance of a well-executed concrete pour.
This guide breaks down the entire process of forming and pouring a concrete slab, with actionable steps to help you achieve strong, crack-resistant slabs for your project.
Table of Contents
- Preparing the Site
- Building and Setting the Formwork
- Creating a Solid Base
- Reinforcing the Slab for Strength Prior Concrete Pouring
- Mixing and Pouring the Concrete
- Finishing Techniques for a Smooth Slab
- Curing the Concrete
1. Preparing the Site
Before any concrete pouring can begin, proper site preparation is essential. Start by clearing the area of all debris, vegetation, and topsoil. The ground needs to be level and compacted to prevent any shifting after the slab has been poured.
Using a vibrating plate compactor will help ensure that the soil is well settled. Keep in mind that neglecting this step may result in uneven surfaces or even long-term slab failure. For residential sites, a depth of at least 150mm of excavation is typical, while commercial projects may require deeper cuts depending on load requirements.
2. Building and Setting the Formwork
Formwork acts as a mould that holds the concrete in place as it sets. To construct the formwork, use durable timber planks or steel that can withstand the pressure of wet concrete.
Accurate measurements are crucial during concrete pouring, as any error in setting the formwork will be reflected in the final slab dimensions. Ensure that the formwork is level using a laser level or spirit level before starting the pouring of the concrete process. Secure the formwork with stakes spaced about 1 metre apart to prevent any shifting during pouring the concrete. The corners should be reinforced to avoid blowouts, especially if the form is larger or carrying heavy loads.
3. Creating a Solid Base
The foundation of your slab depends heavily on the base material. A well compacted base ensures that your concrete slab won’t sink or crack. For the base, use a minimum of 100mm of compacted gravel or crushed rock. This layer aids in water drainage and adds additional stability to the slab.
In areas where the ground has a high moisture content, it’s advisable to add a layer of sand on top of the gravel before pouring. This helps with drainage and prevents rising moisture from damaging the slab over time. Geelong’s weather conditions make this step particularly important during the pouring process.
4. Reinforcing the Slab for Strength Prior Concrete Pouring
Concrete pouring alone does not provide the tensile strength needed to resist cracking, which is why reinforcement is critical. Steel reinforcement bars (rebar) or mesh should be placed on concrete bar chairs to ensure they are positioned correctly in the middle of the slab during the pouring process.
For residential slabs like driveways and patios, mesh reinforcement (with a thickness of 6mm or more) is usually sufficient. For commercial foundations or heavier loads, thicker rebar (10mm or more) may be required. Reinforcement helps distribute weight and prevents cracks from spreading, ensuring your slab’s longevity.
5. Mixing and Pouring the Concrete
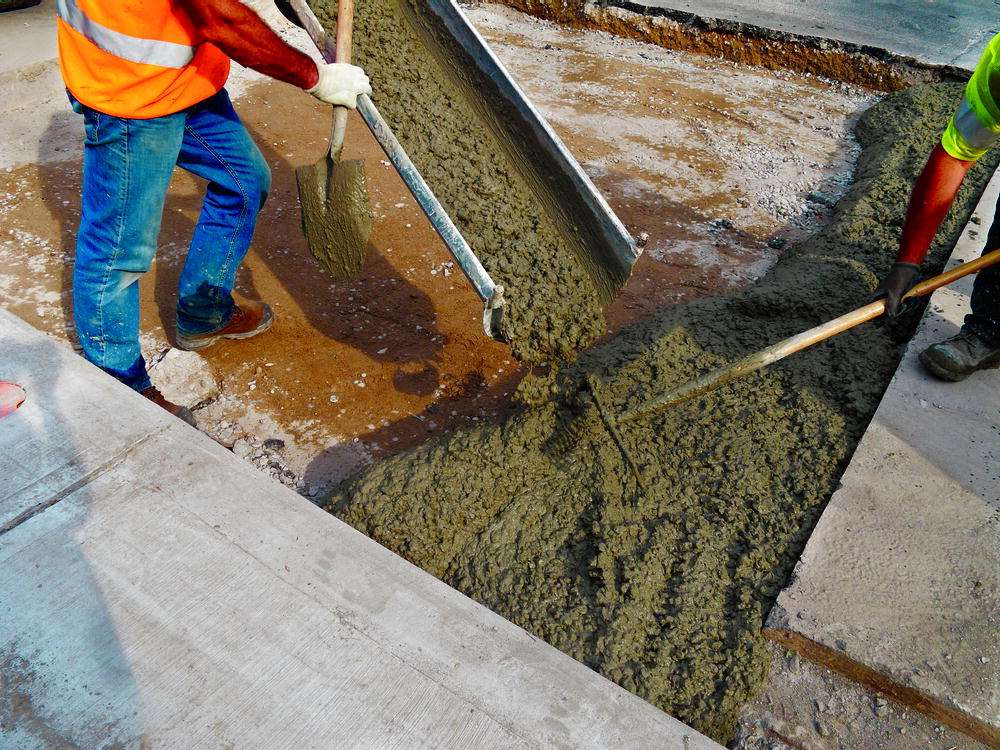
The concrete mix is typically made up of cement, sand, and gravel in a 1:2:4 ratio. For large slabs, using a ready-mix concrete truck is the most efficient method. Before pouring, double-check the weather forecast—rain can ruin a fresh pour, and extreme heat can cause premature drying, leading to cracking.
Start pouring the concrete at one corner and work your way across the form. Use a shovel or rake to spread the concrete evenly, ensuring it fills all gaps. For larger projects, vibrating tools can be used to help the concrete settle evenly and eliminate air pockets.
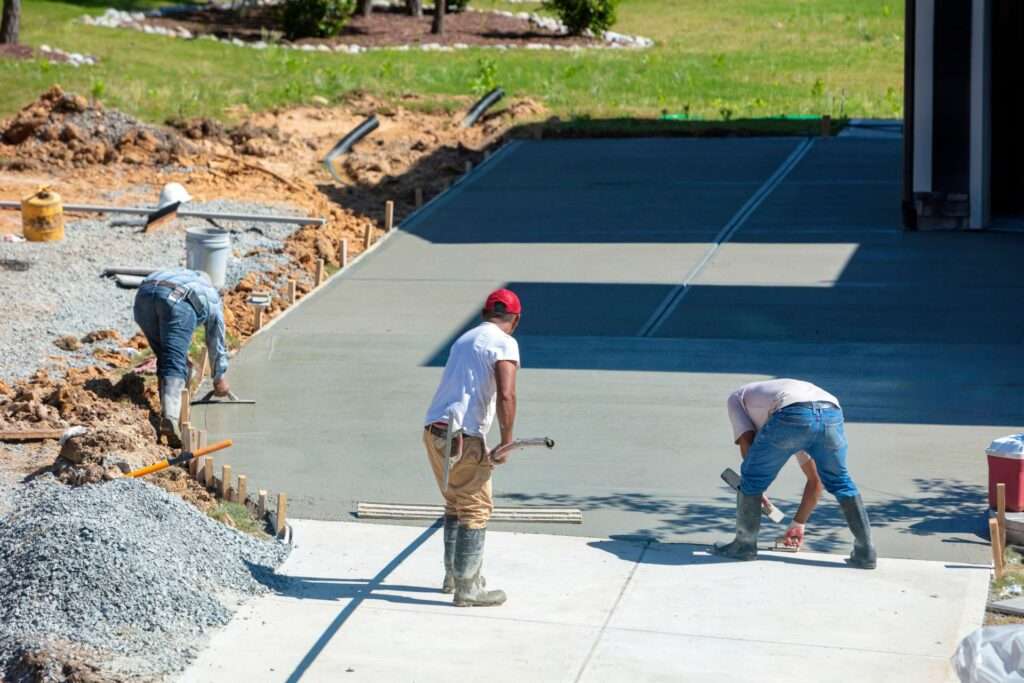
6. Finishing Techniques for a Smooth Slab
Finishing is where precision comes in. After pouring, use a screed to level the surface by pulling it across the top of the formwork. Next, float the slab to smooth out the surface. This can be done manually with a hand float for smaller areas or with a bull float for larger slabs.
Once the initial smoothing is done during the pouring of concrete process, allow the concrete to settle before using a trowel to create a finer finish. If a non-slip surface is required, such as for driveways or paths, consider applying a broom finish to add texture during or after the pouring stage.
7. Curing the Concrete
Curing is the final and often overlooked step in the concrete pouring process, yet it is critical to the strength and durability of your slab. After finishing, the concrete needs time to cure. Cover the slab with plastic sheeting or use a curing compound to prevent moisture loss.
For best results after concrete pouring, the slab should be kept moist for at least seven days. This process ensures the concrete gains maximum strength and durability. In Geelong’s varying weather conditions, it’s vital to monitor the curing process closely after concrete pouring to prevent rapid drying, which can lead to surface cracks.

Five Reasons to Choose Our Business
- Experience Across Various Projects: With years of hands on experience in both residential and commercial concrete projects, we bring unmatched expertise to every job.
- Attention to Detail: From site preparation to final finishing, we ensure every step is meticulously executed to avoid costly repairs down the line.
- Quality Materials: We use only the highest quality concrete mixes and reinforcement materials to guarantee a long-lasting, durable slab.
- Custom Solutions: Every project is unique, and we tailor our services to meet your specific needs, whether it’s a patio, driveway, or large scale commercial foundation.
- Commitment to Client Satisfaction: We pride ourselves on delivering excellent results in every concrete pouring project, ensuring outcomes that not only meet but exceed client expectations.
If you’re planning a concrete project in Geelong, contact our concreting team today for more information or to request a free, no-obligation quote.
FAQs
A concrete slab typically takes around 28 days to fully cure, but it reaches about 70% of its strength within the first week. While it might look and feel solid after just a couple of days, the internal curing process is still ongoing, and rushing to put heavy loads on it too soon can lead to structural weaknesses. Proper curing ensures the concrete reaches its maximum strength, making it more durable and resistant to cracking over time. Factors like temperature, humidity, and the mix design can affect the curing speed, so it’s important to follow proper curing practices, such as keeping the slab moist for at least the first seven days.
The ideal weather for pouring concrete is mild and dry, with temperatures between 10°C and 25°C and minimal wind. If the weather is too hot, the concrete can dry too quickly, leading to surface cracks and weakened strength. On the other hand, if it’s too cold, the curing process slows down, which can make the concrete weaker and more prone to frost damage. A slightly overcast day with moderate humidity is perfect, as it helps the concrete retain moisture and cure evenly. If conditions are too extreme, using protective measures like wet coverings, curing compounds, or temporary shelters can help regulate the curing process.
For a standard residential slab, such as a patio, shed base, or footpath, a thickness of 100mm (10cm) is usually sufficient. However, if the slab is going to support heavier loads, such as in a driveway or garage, a thickness of 125mm to 150mm (12.5cm to 15cm) is recommended. In areas with soft or unstable soil, reinforcing the slab with steel mesh or rebar can improve its strength and longevity. Proper ground preparation, including a compacted base layer of gravel or crushed rock, is also essential to prevent shifting and cracking.
Yes, in most cases, you will need a permit to pour a concrete slab in Geelong, particularly if it is a large, structural, or permanent installation. The exact requirements depend on the size, location, and purpose of the slab. For example, a small garden path or minor landscaping work might not need approval, but a shed base, patio, driveway, or foundation will likely require a permit from the City of Greater Geelong. Checking with the local council before starting your project is essential to ensure compliance with building regulations and avoid potential fines or issues down the track.
It’s not recommended to pour concrete directly onto soil without proper preparation, as this can lead to cracking, sinking, and uneven curing over time. Soil can shift, expand, or contract with moisture changes, which weakens the stability of the slab. Instead, it’s best to compact the soil thoroughly and add a layer of crushed rock or gravel to create a firm and stable base. A vapour barrier or plastic sheeting can also be used to prevent moisture from seeping into the slab from underneath, which helps improve durability. Proper preparation ensures that the concrete cures evenly and remains strong for years to come.
Cracking is one of the most common issues with concrete, but there are several ways to minimise the risk. Firstly, keeping the concrete moist during the curing process, especially in hot or dry weather, prevents it from drying too quickly and developing shrinkage cracks. Secondly, using control joints—pre-planned cuts in the slab—allows the concrete to expand and contract naturally without causing random cracks. Reinforcement with steel mesh or rebar adds extra strength and stability, reducing the likelihood of structural cracks. Ensuring a properly prepared base and avoiding excessive loads too soon after pouring will also help keep your concrete in top shape.
You can typically walk on a concrete slab after 24 to 48 hours, but it’s best to wait at least a week before placing any heavy loads on it. While the surface may appear solid, the curing process is still ongoing, and early foot traffic could cause minor damage or weaken the finish. If the weather is particularly cold or humid, curing may take longer, so giving the slab extra time to strengthen is a good idea. If you need to use the area sooner, consider using lightweight boards to distribute weight and minimise stress on the fresh concrete.
